Very cool, Pete! Looking forward to seeing what you can come up with.
You are using an out of date browser. It may not display this or other websites correctly.
You should upgrade or use an alternative browser.
You should upgrade or use an alternative browser.
1/6 Luke & Leia swing bridge Dio
- Thread starter ScratchBuilder
- Start date


Help Support Custom One-Sixth Figures Forum:
This site may earn a commission from merchant affiliate
links, including eBay, Amazon, and others.
ScratchBuilder
Freakazoid
PM sent.
Also, you should provide the option to have the control panel showing "blaster damage" from when Luke shot it out.
Good call, but believe it or not this was an option I gave the customer for the original one and the undamaged panel was chosen.
Think the best way forward here chaps would be for us to provide 2 interchangeable panels secured with magnets and gives the end user the option.
Spudtrooper
Super Freak
Good call, but believe it or not this was an option I gave the customer for the original one and the undamaged panel was chosen.
Think the best way forward here chaps would be for us to provide 2 interchangeable panels secured with magnets and gives the end user the option.
I like that idea. :yess:
Darth Zullo
Freakalicious
- Joined
- Sep 23, 2015
- Messages
- 158
- Reaction score
- 1
How much would something like this run for?
hemble
Super Freak
Damn that looks impressive and it's going to even more so when it's painted and has the figures on it.
Ron
Ron
clparker04
Super Freak
Amazing work, great detail I can not wait to see some paint on this
Brundledonk
Freakazoid
- Joined
- Sep 2, 2015
- Messages
- 367
- Reaction score
- 1
Righty Ho then !
I'm at a point with the mine carts I'm painting in the Indy section that I have some time to make a start on trying to bring this piece to life a little bit.
The weather is bad up here in middle earth today and I don't want to spray the primer inside the Petecave as even though I have a pretty decent sized spray booth this build is just too big to fit and catch all of the fumes/overspray and as there is no ventilation other than the booth I don't want to risk asphyxiation lol !.
Once I've primed and start using the airbrush it won't be so bad but rattle can primer is a no no inside on something so large.
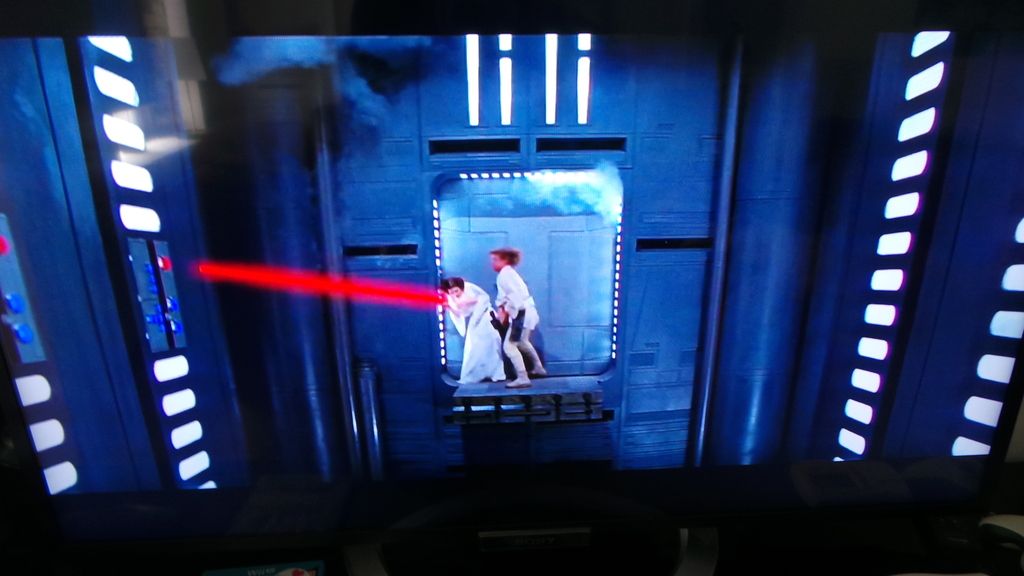
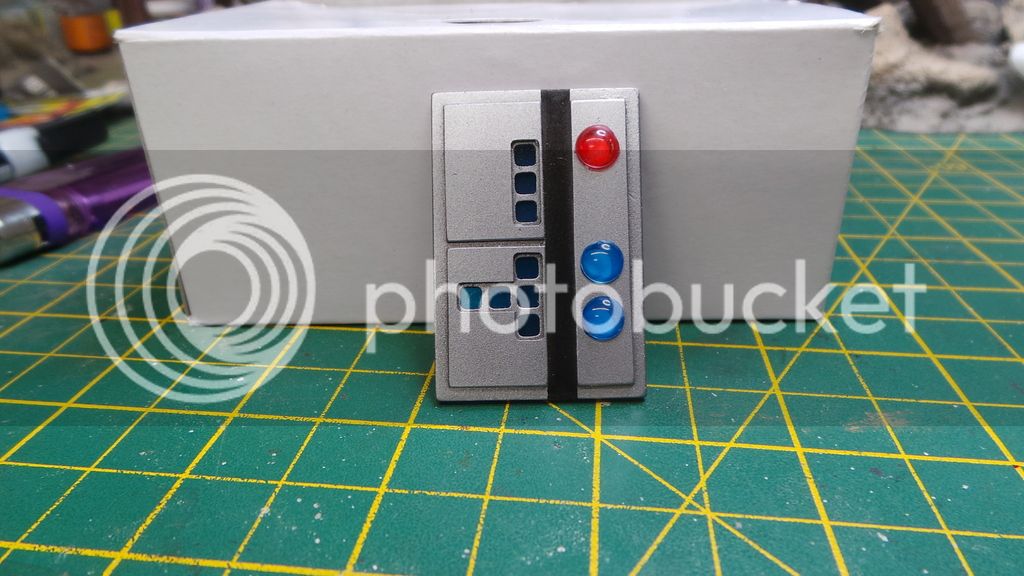
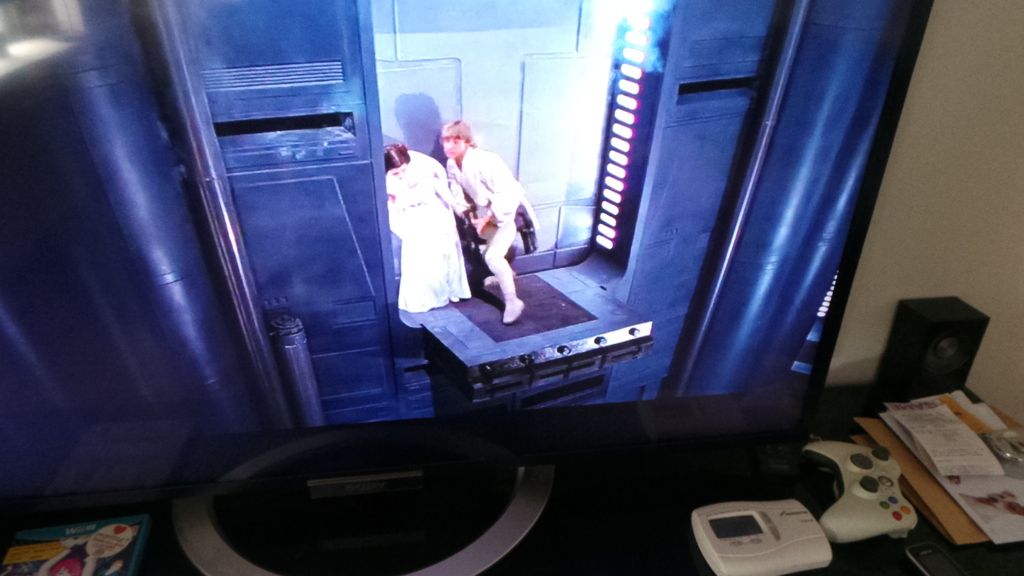
So I have decided to work on the door control panel. Please note that at the moment this is a proof of concept and I think Jason will be making a slightly different one but we will see what happens as we move along.
Dodgy pic taken while pausing the movie
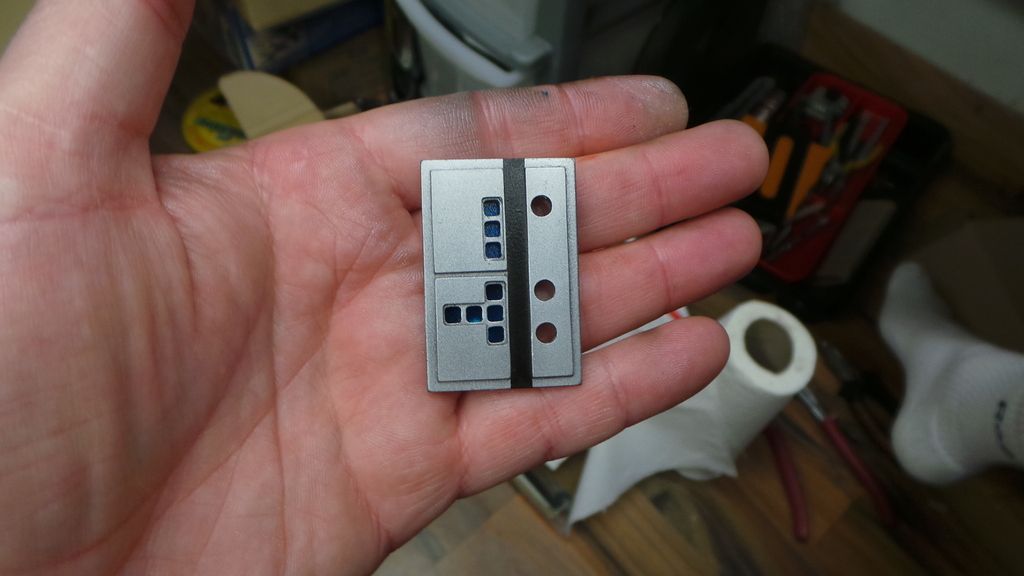
Model panel painted white aluminium and semi gloss black
I'm at a point with the mine carts I'm painting in the Indy section that I have some time to make a start on trying to bring this piece to life a little bit.
The weather is bad up here in middle earth today and I don't want to spray the primer inside the Petecave as even though I have a pretty decent sized spray booth this build is just too big to fit and catch all of the fumes/overspray and as there is no ventilation other than the booth I don't want to risk asphyxiation lol !.
Once I've primed and start using the airbrush it won't be so bad but rattle can primer is a no no inside on something so large.
So I have decided to work on the door control panel. Please note that at the moment this is a proof of concept and I think Jason will be making a slightly different one but we will see what happens as we move along.
Dodgy pic taken while pausing the movie

Model panel painted white aluminium and semi gloss black

Brundledonk
Freakazoid
- Joined
- Sep 2, 2015
- Messages
- 367
- Reaction score
- 1
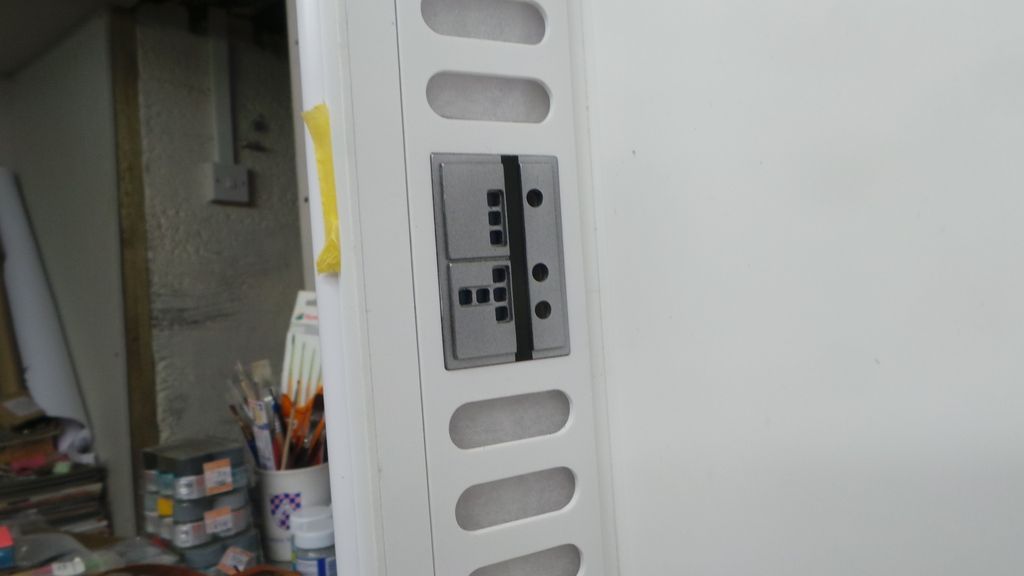
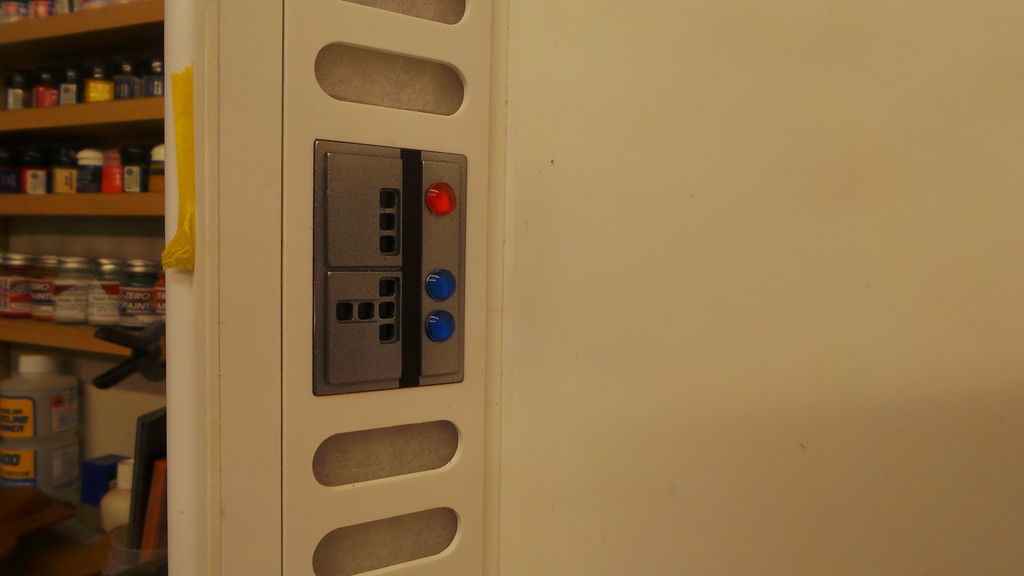
And in place on the dio. There is acetate sprayed clear blue fixed behind the small square lights
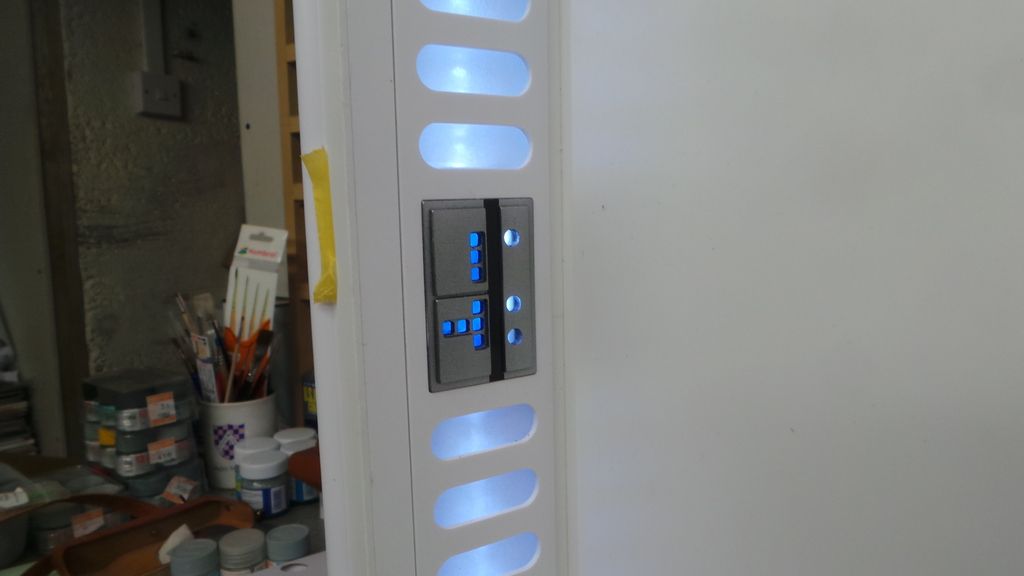
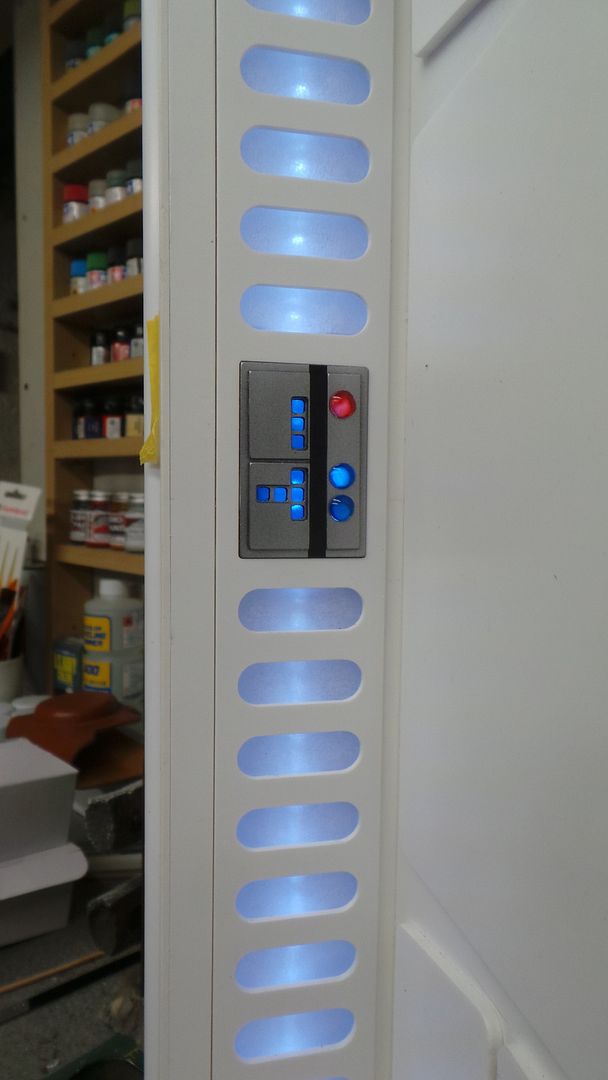
Easier to see with the lights on
Sprayed some clear domes with clear blue and red from the back and glued on
Set in place for a quick looksee

Easier to see with the lights on

Sprayed some clear domes with clear blue and red from the back and glued on

Set in place for a quick looksee

Brundledonk
Freakazoid
- Joined
- Sep 2, 2015
- Messages
- 367
- Reaction score
- 1
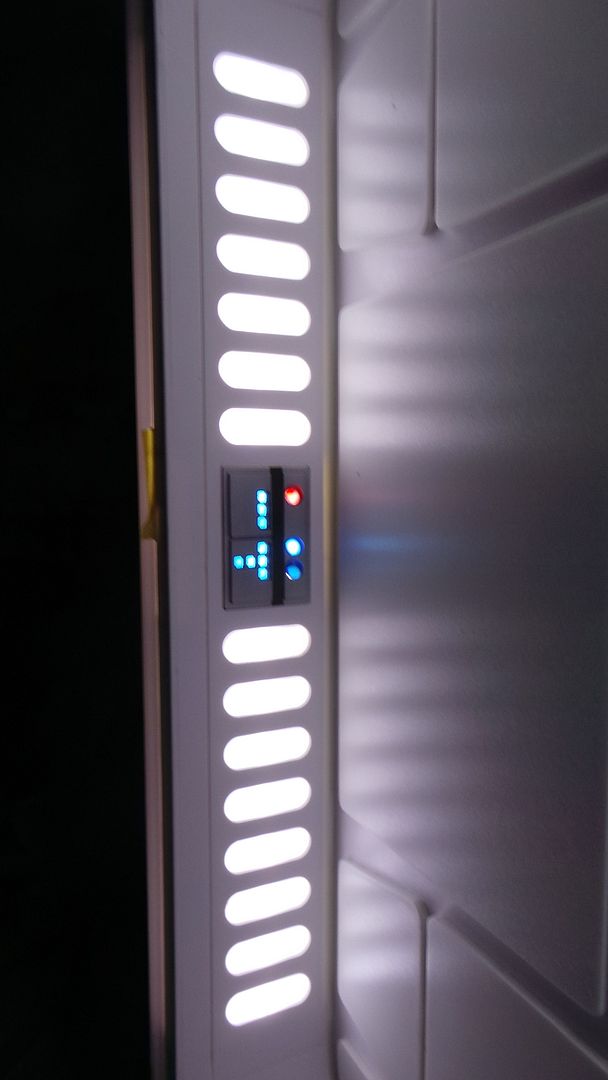
And with some back light shenanigans
The red light needs a drop more clear red as the glue removed a tiny bit of it, not a problem as the glue dries crystal clear and I'll be able to drop a bit in from the back once it's dried fully
Also the light bleed you can see on the bottom light has been sorted ( I just needed to move the lens ) the glue was still wet when I took the pics and I hadn't tweaked the positions at this point

Brundledonk
Freakazoid
- Joined
- Sep 2, 2015
- Messages
- 367
- Reaction score
- 1
Not much I know ( but from little acorns, right ? )
I'll put a pic up of the fixed red light once the glue dries and hopefully I'll be able to make some more progress over the week to show
Cheers
Pete
I'll put a pic up of the fixed red light once the glue dries and hopefully I'll be able to make some more progress over the week to show
Cheers
Pete
Spudtrooper
Super Freak
Awesome! :clap
This is so epic! :clap
I like the magnetic swap-out control panel idea... but truthfully I think I'd always want it 'clean' because I have a thing for light-up functions.
I can see this thing hanging on my wall.... with Luke and Leia looking out to the great chasm of my room.... with another doorway on the opposite wall with two stormtroopers taking aim. How insane would that be???
And with some back light shenanigans
The red light needs a drop more clear red as the glue removed a tiny bit of it, not a problem as the glue dries crystal clear and I'll be able to drop a bit in from the back once it's dried fully
Also the light bleed you can see on the bottom light has been sorted ( I just needed to move the lens ) the glue was still wet when I took the pics and I hadn't tweaked the positions at this point
pjam
Here on the Perimeter
PM sent. I DREAM of this stuff.
Brundledonk
Freakazoid
- Joined
- Sep 2, 2015
- Messages
- 367
- Reaction score
- 1
Thanks Spudtropper and Wor-Gar, only a small start but I'm off the blocks :yess:
It's been wetter than Atlantis here for the last couple of days but this morning there was a break in the weather so I took advantage of the sunshine and got outside with the primer.
It's been wetter than Atlantis here for the last couple of days but this morning there was a break in the weather so I took advantage of the sunshine and got outside with the primer.

Looking good.
Brundledonk
Freakazoid
- Joined
- Sep 2, 2015
- Messages
- 367
- Reaction score
- 1
I used an acrylic primer that's pretty quick drying so it wasn't too long before I could get out the Alclads and get some base colours on the front and sides of the step
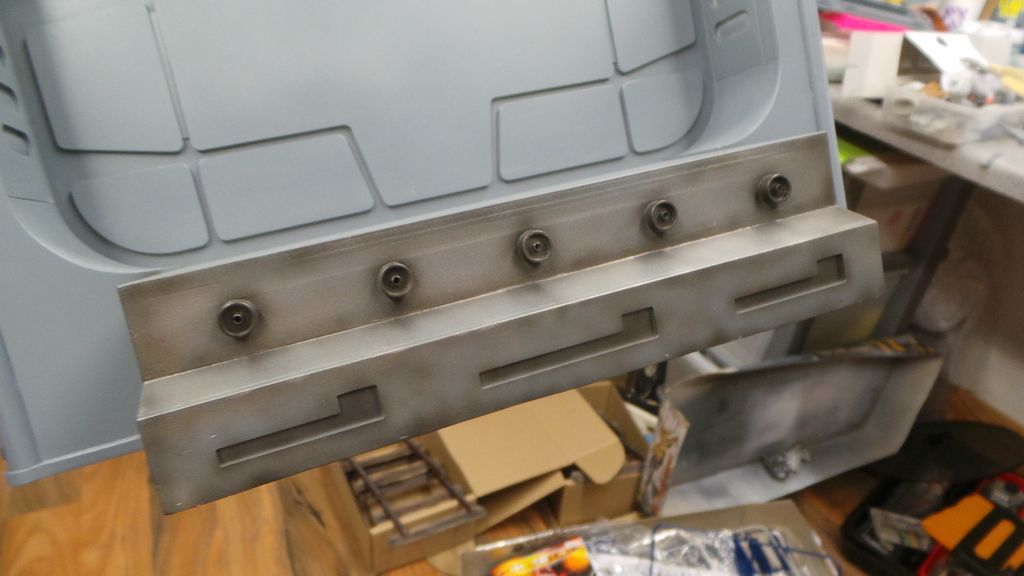
It's difficult to capture the look with the camera but there are quite a few different metalic tones going on here
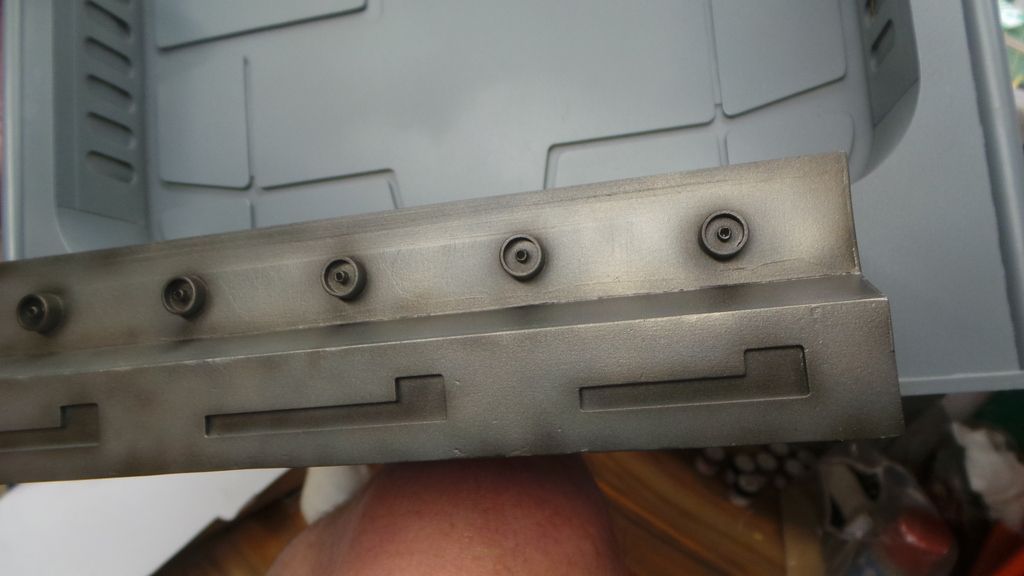
Bare in mind that this is just the base colours, I am going to do some more work on this area to get it to look a bit closer to what's on the screen in the movie but I want to wait until all the main painting is done so I can get a feel for what it needs

Brundledonk
Freakazoid
- Joined
- Sep 2, 2015
- Messages
- 367
- Reaction score
- 1
Thanks buddy, it's beginning to come to life a little bit now some colours are going on
Pete
Pete
Brundledonk
Freakazoid
- Joined
- Sep 2, 2015
- Messages
- 367
- Reaction score
- 1
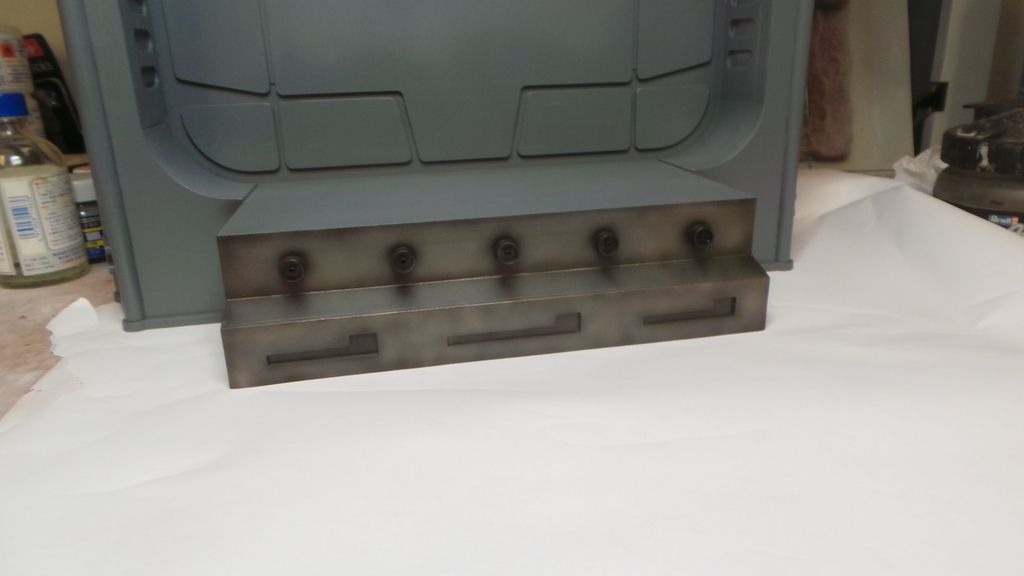
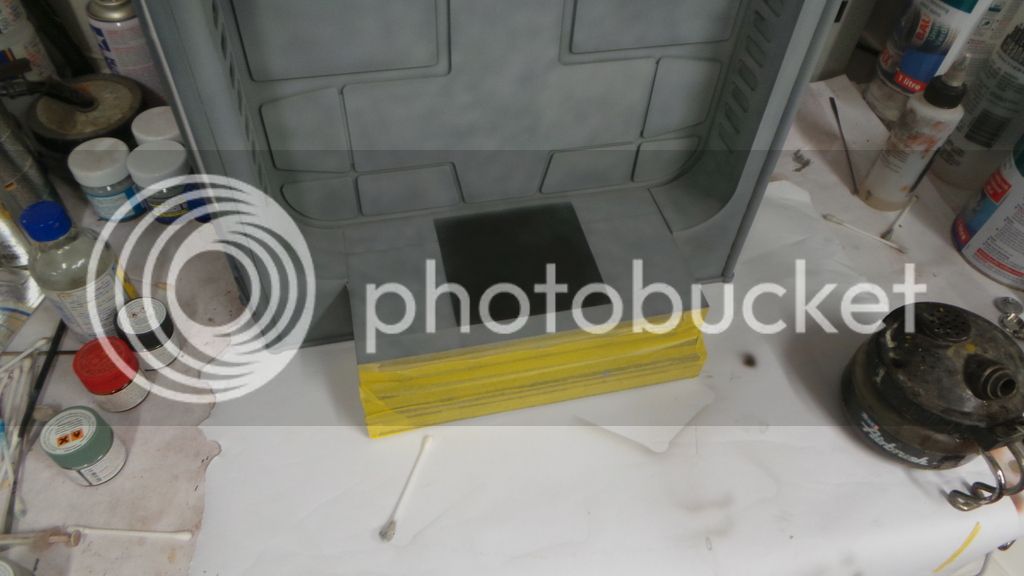
Screen grabs show that there is a square of black on the floor
So out with the masking tape !
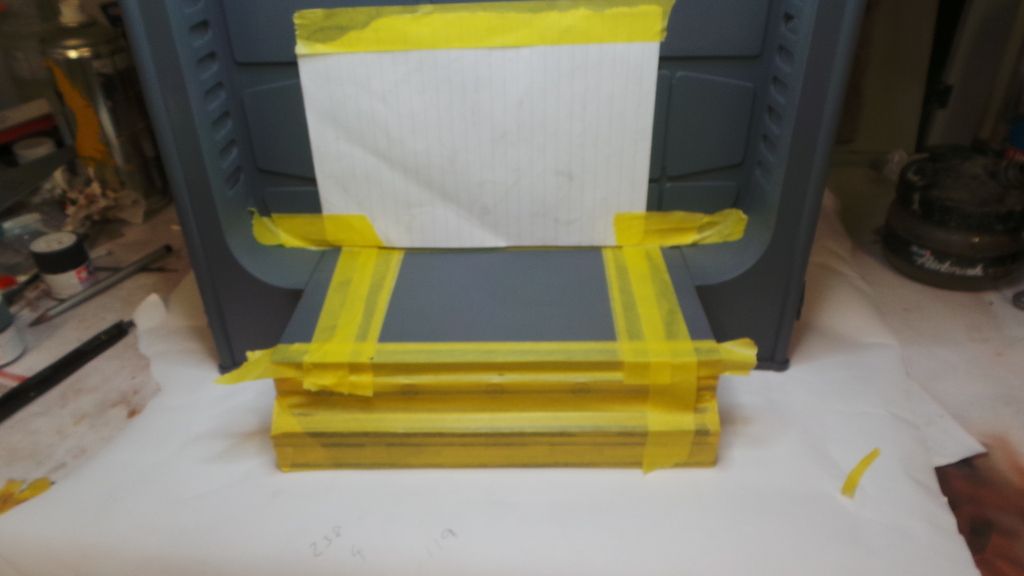
I sprayed the square with a really dark grey rather than straight black and also narrowe the width of it as it looked a bit wide compared to the reference pic. Do you think it looks ok or does it need to be wider ? Please let me know what you reckon.
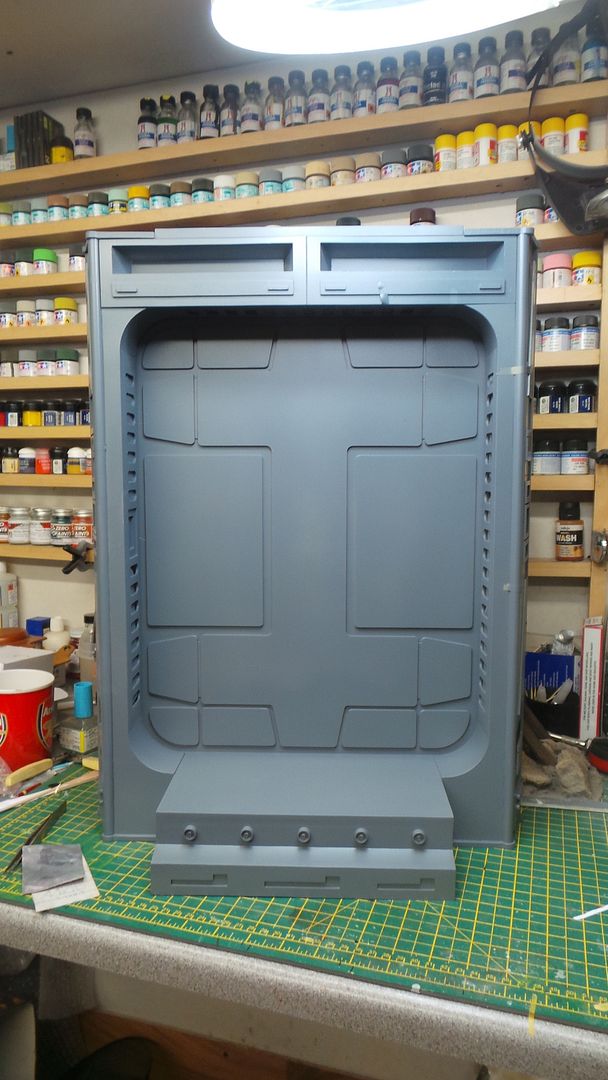
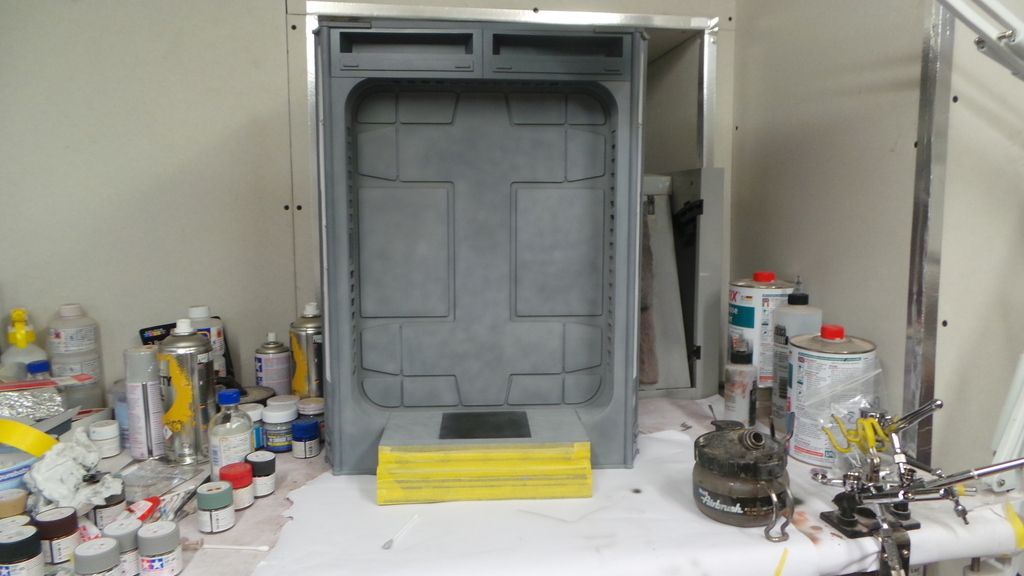
Also the dio has had its first coat of paint, I thinned it right out and kind of mottled it on and will do this mutiple times with darker and lighter mixes of the the base colour to give some tonal variation to the finish and add high and low lights
Remember this is very much in progress and will look completely different once I get all the shades of grey ( 50 ? Lol ) laid on and blended in, also the panel at the top with the recesses hasn't been done yet and is still in primer

So out with the masking tape !

I sprayed the square with a really dark grey rather than straight black and also narrowe the width of it as it looked a bit wide compared to the reference pic. Do you think it looks ok or does it need to be wider ? Please let me know what you reckon.
Also the dio has had its first coat of paint, I thinned it right out and kind of mottled it on and will do this mutiple times with darker and lighter mixes of the the base colour to give some tonal variation to the finish and add high and low lights
Remember this is very much in progress and will look completely different once I get all the shades of grey ( 50 ? Lol ) laid on and blended in, also the panel at the top with the recesses hasn't been done yet and is still in primer


Brundledonk
Freakazoid
- Joined
- Sep 2, 2015
- Messages
- 367
- Reaction score
- 1
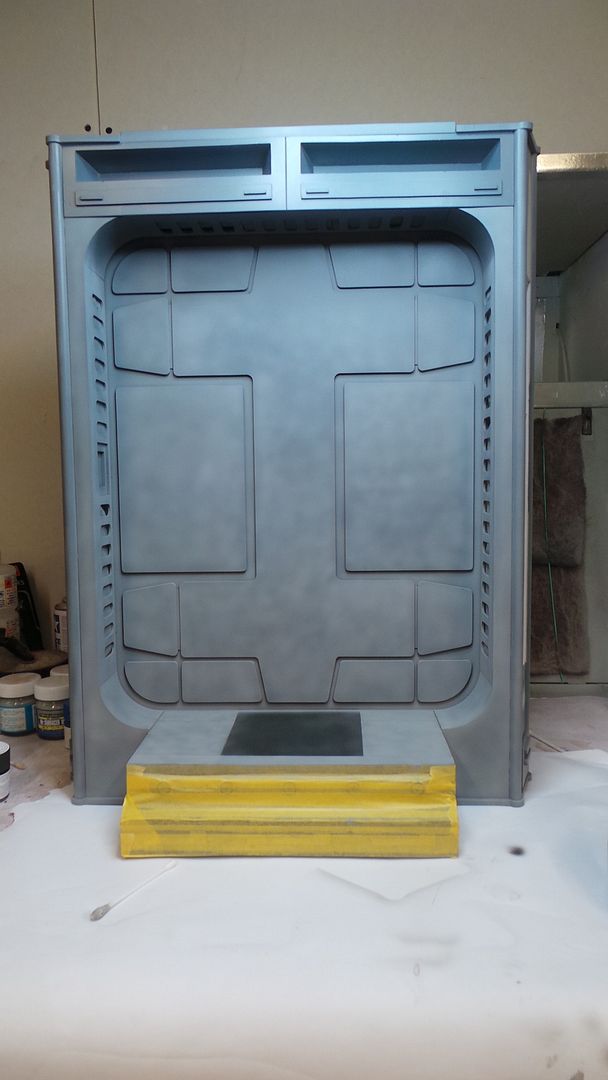
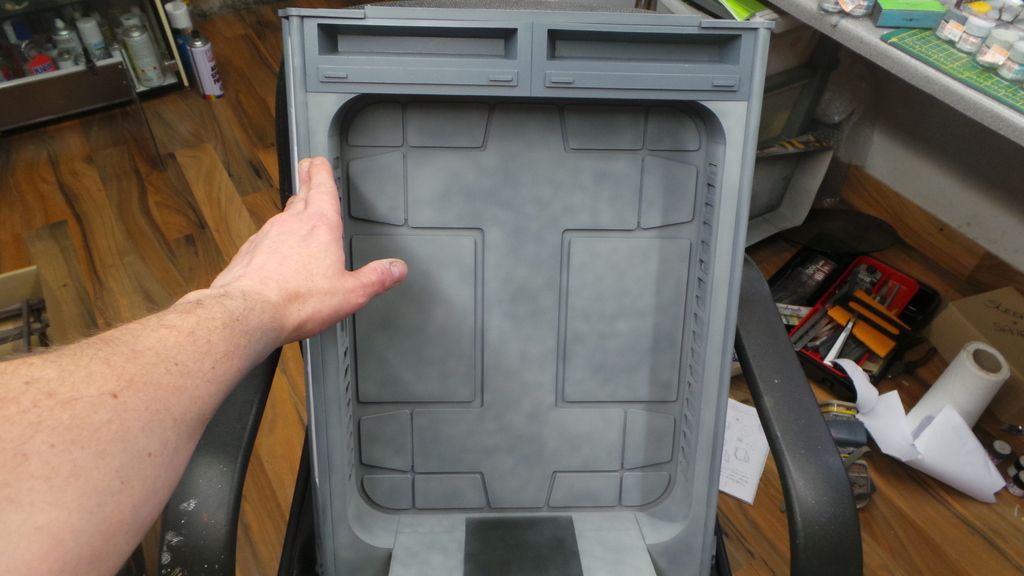
I'm going to soft mask some panels on the floor and spray them in different tones to each other ( you can see the beginnings of it in this pic )
This is by far the largest object I've sprayed and I had to dismantle a chunk of my booth so I could get it on the bench to paint.
This pic with my hand gives an idea of the size

This is by far the largest object I've sprayed and I had to dismantle a chunk of my booth so I could get it on the bench to paint.
This pic with my hand gives an idea of the size

Brundledonk
Freakazoid
- Joined
- Sep 2, 2015
- Messages
- 367
- Reaction score
- 1
I'll post some more pics after I have got the rest of the shades sprayed on in a couple of days.
Cheers guys
Pete
Cheers guys
Pete