SECOND RUN CLOSED: Bill the Butcher Clothing Set/Coat

Custom One-Sixth Figures Forum

Help Support Custom One-Sixth Figures Forum:

This site may earn a commission from merchant affiliate links, including eBay, Amazon, and others.
Re: Bill the Butcher Clothing Set

Received mine today Moe, awesome job! Unfortunately waiting on my TTM21 to come in, can't wait for the belt/knives, hat, shoes Robbie!
 
Re: Bill the Butcher Clothing Set

Just got Moe's outfits! Any tips on how to put the shirt on a TT21? Struggling and can't get it on. Can the arms be removed from the shoulder?
 
Last edited:
Re: Bill the Butcher Clothing Set

Thanks Robbie - I'm actually trying that as well but have no luck so far, the shoulders are simply to wide on this TT21...maybe I simply have to stretch the shirt a little...

ok nevermind...finally got it on...its possible but tricky...the arms have to be at multiple "correct" angles throughout the process haha..

Quick question about the RM Bill headsculpt, what exactly do we need to do to get the neck connector to work? Needs some kind of plug right? Is there anyway to get that without butchering a HT headsculpt?
 
Last edited:
Re: Bill the Butcher Clothing Set

Entropy mentioned he'd be up for making the chestpiece for this after he finishes the Dude accessories!! The chestpiece has a neck so whew!
 
Re: Bill the Butcher Clothing Set

The RM Bill sculpt isn't neck ready though, the hole underneath the sculpt is like a cylinder and isn't ready for a standard HT TTM neck that uses a ball joint / socket....kind of hard to describe without pictures...

Best way to describe it is think of the RM H+C shoes where the hole in the shoes/ boots aren't sculpted such that a ball-peg could fit right in. You'd have to first plug in the hole with a ball-socket.
 
Re: Bill the Butcher Clothing Set

You really do have me confused now. Gulp.

So those sculpted neck/chest pieces... they connect to Rainman's head with a special ball/socket piece?
 
Re: Bill the Butcher Clothing Set

Hey Robbie...I just freed up a TTM19 body to use on Bill...really like how it looks on yours :)

Trying to put the shirt on now, and following your steps you wrote earlier...don't want to damage my TTM19, but does lower arm just pop off at the elbow? I'm pulling but it seems like it will break..don't want to go any further...or are u taking off the entire arm?
LMK
Thanks for the help brotha
 
Re: Bill the Butcher Clothing Set

I used a hairdryer to soften it up. Take it easy and watch the joint. It did take a lot of pulling. I was pulling the crap out of it before I switch to the hairdryer. So my figure took some serious abuse before I finally got smart.

*Not responsible for damage of figures to my instructions* ;)

:rotfl thanks Robbie! The hair dryer worked to perfection! Arm came off with no break! Thanks again brotha! :hi5:
 
Re: Bill the Butcher Clothing Set

Wow, thanks for the explanation. So uhh... where do we get that socket plug?
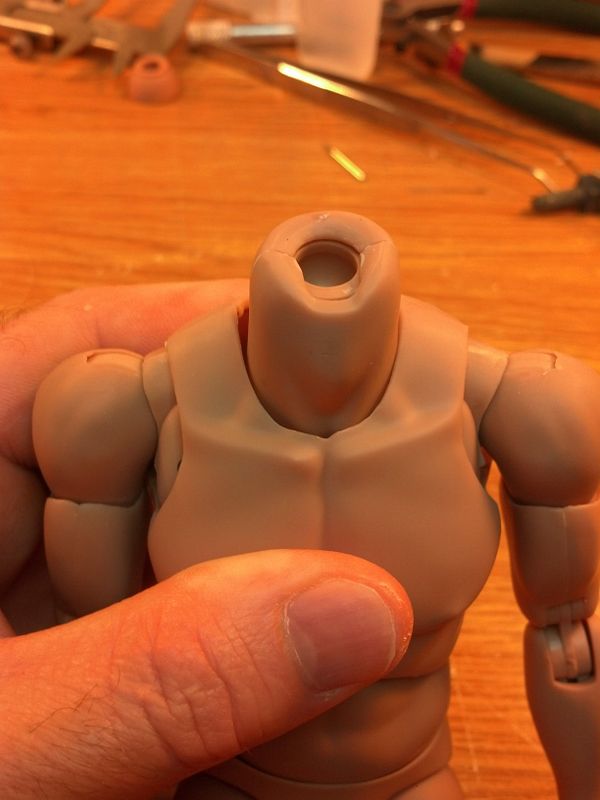
I'm fairly new to this but from what I've read it seems like we have to pretty much obtain that "plug" from an existing HT head that fits that type of neck post...maybe someone's selling those plugs as well...not to sure...

The neck post with neck peg that comes with the TTM21 can hold the RM Bill head, but its not secure...my RM head fell off :slap...fortunately no visible damage. Can't imagine what I'd do if the mustache broke...man...dangerous stuff...so yah...my Bill is now headless until I can figure it out.
 
Re: Bill the Butcher Clothing Set

Ok fellas,here is what I came up with that requires no cutting or drilling.
Im a big fan of magnets. I use them all the time in my scenic models and I, like many, have used them to attach heads to bodies.
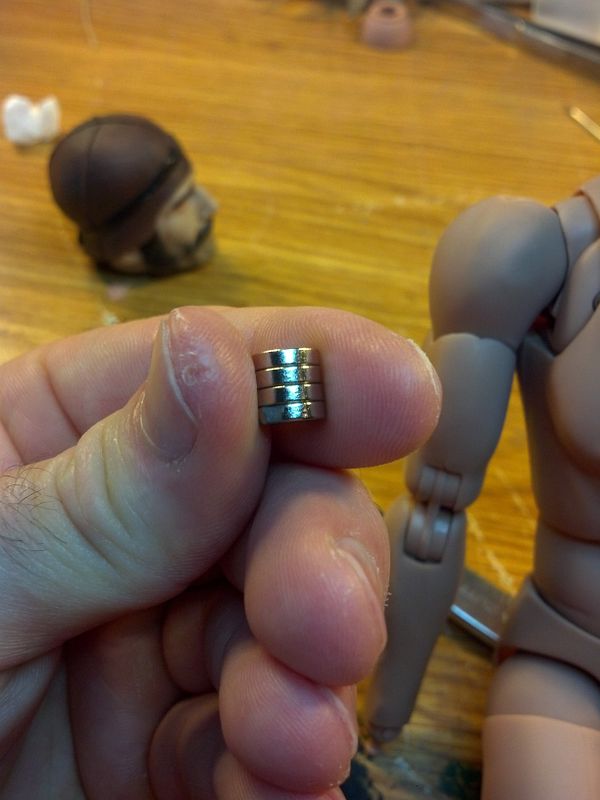
You will need two sizes of rare earth magnets(silver not black).
The bigger of the two I got from Ace Hardware. (12mm disk)
The smaller from Harbor Frieght.(8mm disk)

First pull out the post of the neck. I used pliers with a little bit of hairdryer.
IMG_20130519_115545_027.jpg


Glue in a stack of the smaller magnets. I put a drop of thick super glue in then add a magnet repeating the process till I get to the top. Technically you only really need to glue one magnet to the neck, but gluing them all keeps them from pulling out when you remove the head. I use super thick cyanoacrylate glue for everything I do but you can use epoxy or what ever.
IMG_20130519_115552_940.jpg

IMG_20130519_120406_467.jpg


Use the bigger magnet and glue it to the inside of the head. The big one is wide enough to not go into the drilled hole. Smaller ones can be used but you will either need to fill the hole or stack enough so that it can get close enough to the next magnets to hold.
IMG_20130519_115532_900.jpg


And that's it. I don't know if this makes the head sit at the correct height. Height adjustment may require more modding. I think cutting down the neck may be required if you find it sits too high. Only thing I made permanent on this was gluing the big magnet in because I'm not going to use this body for mine.
Hope this helped.
IMG_20130519_115633_187.jpg
 
Ok fellas,here is what I came up with that requires no cutting or drilling.
Im a big fan of magnets. I use them all the time in my scenic models and I, like many, have used them to attach heads to bodies.
You will need two sizes of rare earth magnets(silver not black).
The bigger of the two I got from Ace Hardware. (12mm disk)
The smaller from Harbor Frieght.(8mm disk)

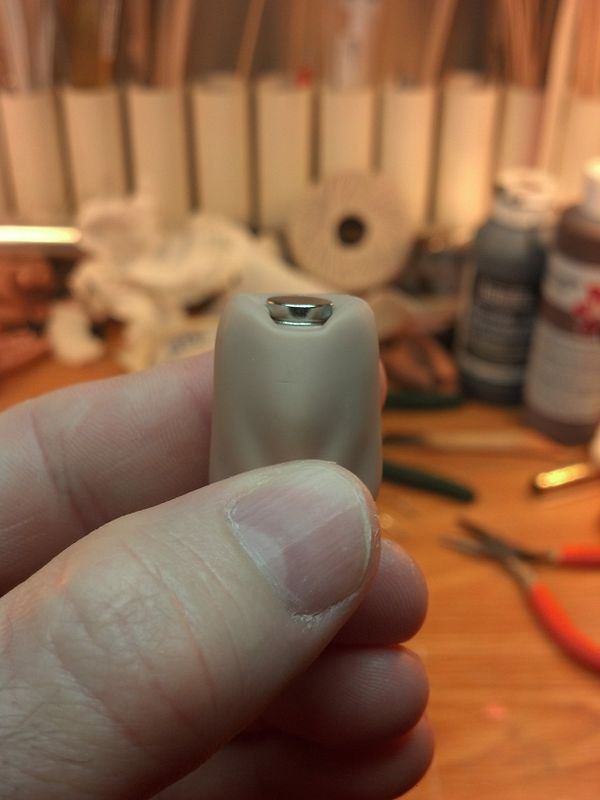
First pull out the post of the neck. I used pliers with a little bit of hairdryer.
IMG_20130519_115545_027.jpg


Glue in a stack of the smaller magnets. I put a drop of thick super glue in then add a magnet repeating the process till I get to the top. Technically you only really need to glue one magnet to the neck, but gluing them all keeps them from pulling out when you remove the head. I use super thick cyanoacrylate glue for everything I do but you can use epoxy or what ever.
IMG_20130519_115552_940.jpg

IMG_20130519_120406_467.jpg


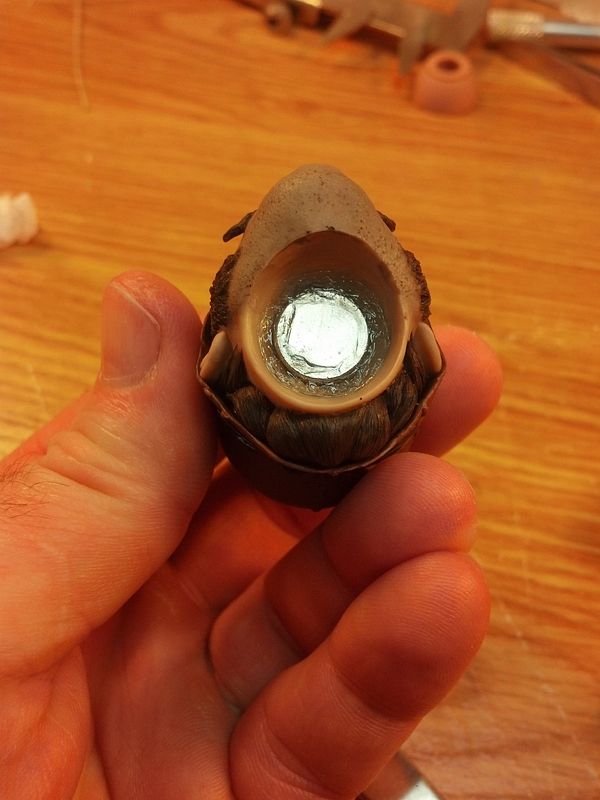
Use the bigger magnet and glue it to the inside of the head. The big one is wide enough to not go into the drilled hole. Smaller ones can be used but you will either need to fill the hole or stack enough so that it can get close enough to the next magnets to hold.
IMG_20130519_115532_900.jpg


And that's it. I don't know if this makes the head sit at the correct height. Height adjustment may require more modding. I think cutting down the neck may be required if you find it sits too high. Only thing I made permanent on this was gluing the big magnet in because I'm not going to use this body for mine.
Hope this helped.
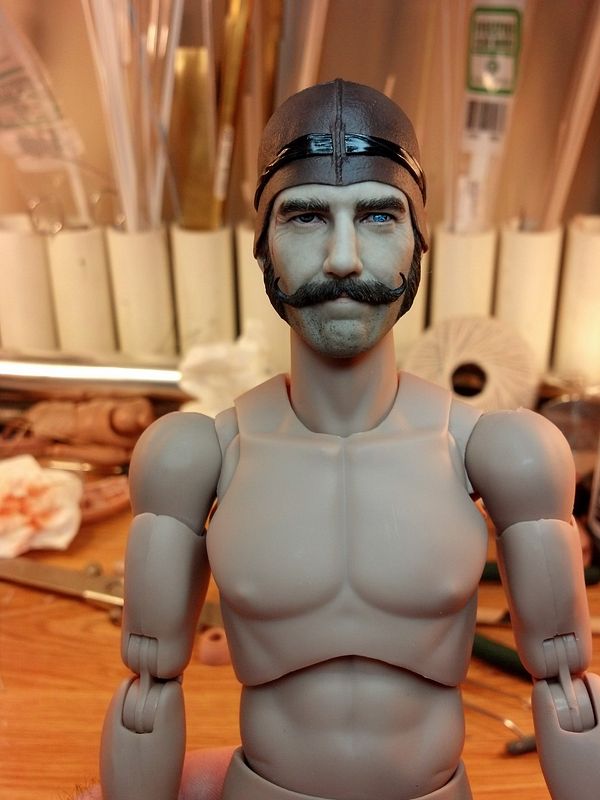
IMG_20130519_115633_187.jpg

Thanks for having our back with this rob
Great advice bro it looks great on the ttm21 I was gonna go with the slim version .

Rainmans looks like its on a slim but have been told its on the narrow must have something to do with the chest piece makeing it smaller as mines on a narrow but the rm jacket feel very tight on it .
 
Re: Bill the Butcher Clothing Set

Got my set yesterday, Thanks Moe!

Now just have to wait on the shoes, hat and belt/knives set. You're my only hope Robbie :D

Thanks for the advice on the magnets.

 
Last edited:
Back
Top